In December of 2009, a Croquembouche was on the cover of Martha's monthly magazine. Towering at two feet high, the glossy, light-amber edible "Christmas tree" looked very tempting. Although my baking skills in the kitchen are a touch more advanced than basic, I decided to give it a try. My dad found out that I was attempting this and so he called me. He said, "That looks awfully advanced, Morgan. What are you going to do if it doesn't turn out?" I quickly told him that it's not life and death in the kitchen...well most of the time, that is. So if it didn't turn out, I'd laugh about it and melt into a quiet evening NOT in the kitchen.
For some unexplainable reason (the stars must have been aligned kinda thing), it turned out. Some of you have asked me to post pictures of my finished product, and so I have. I have also included some VERY important comments that you will NOT find elsewhere. Happy baking!
1) Rule number one. Bake WITHOUT A BRA ON while wearing a slightly ethereal t-shirt. I did, and I got free babysitting from, oh about 3:30 until 9:30pm! It was wonderful. Thank you Ben! Don't do this if you have company over or if you have children old enough to gawk and run away from you in horror.
2) Isn't it amazing what such simple ingredients can yield? I had to capture the simplicity here.
3) While making the puffs, once you have melted the butter in the water with the salt and sugar, add the flour slowly. If you don't, it will be one big lumpy mess here. By the way, the mixing required at this step is a workout. There is absolutely no need to lift any weights today, ladies! Wooohoooo!
4) While following the directions for your Croquembouche(regardless of where you find your recipe), you want to mix the water, butter, salt and sugar well until you notice a film on the bottom of your pot. Here is a picture of what the film looks like.
5)When it comes to piping the puffs onto the parchment paper, I could not find my 1/2-inch-wide pastry tip. Soooo, I just used the coupler without a tip and called it good. Just remember, if you do this, after piping onto parchment, go back with your fingers and smooth out the puffs to keep them looking round.
6) Do not forget the egg glaze. I had Ben give me a hand with a round of puffs in the oven and he forgot. Bless his heart. The glaze is important because it keeps them shiny and helps them to brown nicely too.
7) The pastry cream has two steps. The first stage without the addition of chocolate, and then the second stage where you add your melted chocolate. Beginning with the first stage, you are making a custard-like cream here. Watch your temperature! Really, really scrape the bottom of your pot while mixing continuously so that nothing burns. Trust me, it's a long story.
8) Once you melt your chocolate and espresso in a double boiler (or a heat proof bowl), add that mix to your pastry cream. Make sure you work out all the lumps. Use the back of your spoon to help you, if needed. Remember, the cream is going to be bitten into, so you want a nice uniform texture. No lumps.
9) Backing up to the "custard step", you will notice that scalding your milk is required. I thought, "What the heck is that?" Scalding your milk means that you want to warm it to 185 degrees. Scalding helps by destroying enzymes that affect how the milk behaves in your recipe and it keeps the milk from thickening too much in your batter. So don't get confused when they tell you to scald the milk. Just get out your trusty old candy thermometer and wait for the temp to reach 185.
10) When filling your pastry puffs with cream, your recipe will typically call for a 1/4-inch-wide tip. Again, couldn't find it, so I just used a medium tip that was pointy enough to puncture the puff. Don't worry if you don't have the 1/4-inch-wide tip.
11) For the spun sugar- I did not use the spun sugar. Keep in mind that spinning sugar can be tricky. When making the caramel, the extra caramel is going to be spun (by moving two forks back and forth with the caramel in between) and should be a VERY light amber color. Once the sugar becomes darker than this, something really odd happens. Once it cools, hard sugar crystals form and you can kiss your spun sugar croquembouche goodbye. I made two batches of spun sugar and found that if I had just worked quickly assembling the Croquembouche, the original batch of caramel would have been fine for spinning. Key point- work quickly and don't over heat your caramel.
12) Safety Point: At one point you will be dipping your pastry puff into HOTTTT caramel. USE small tonges to do this. I didn't and I scalded not only the milk today, but my right middle finger, in addition to a few tips of my fingers. Profanity flung out of my mouth. Trust me, even if you don't swear, strange and awful words will come out. Be careful!
13) Enjoy!
The below picture shows the puffs before assembly.
The kids absolutely loved it!
Here it is!
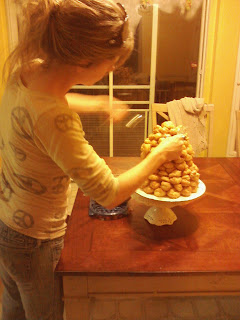
The assembly
I'm getting a little tired here. Can ya tell?
The chocolate-espresso filling is kicking in.
Girls LOVE chocolate.
The End...


