*Recently, I've been finding myself in one kitchen escapade after another (see my marthaandmorgan.blogspot.com blog for more). A few months ago, my homemade caramel was nothing but a jar full of sweet, buttery, grit until I decided to give it a second chance.*
As I was cleaning out my refrigerator this evening, it occurred to me that some of the items being mindlessly tossed into the trash could indeed receive a second chance. I love second chances simply because giving up has not become one of my coping skills (I was a teen mother turned college grad). Unfortunately, not everything in life allows for "seconds". On the other hand, second chance can be applied to items that we find around the house, in our closets and even inside our refrigerator. Like an old sweater re-gifted to a friend, items in the refrigerator can be thought of in a similar manner. Let me explain.
At my house, mid-December was one big, giant baking bash. I baked goods ranging from chocolate-almond bark, to my very first croquembouche. In between, other items popped out of the oven and simmered on the stove. However, one item in particular comes to mind, when we're talking about second chances. Hot, ooey,gooey, buttery, melt-in-your-mouth caramel (OK, right about now you are probably wondering what the heck I'm talking about, right? The suspense is unbearable! Read on).
Back to de-cluttering my fridge. I was shuffling through the refrigerated items when I began to carefully cup in my hands a glass jar of my homemade caramel from December. It was then that my novice baking skills led me to believe that I could approximate the finishing point of the caramel (without the use of a candy thermometer). So not true. Cooking, like relationships, can have abrupt and confusing finishes that turn out to have a very gritty ending. Without the proper tools, often times we make mistakes. Consequently, I was left with a pan full of wonderful caramel, except for one very obvious imperfection...the grit (the grit is the sugar that has not yet melted). My fellow bakers out there know what I'm talking about. You walk a thin line when making caramel, or fudge for that matter. Temperature, among other factors, is extremely important.
While at my kitchen sink this rainy and cold afternoon, I pried the jar of caramel open and ran the tip of my finger over the sand-like surface. I thought to myself, "certainly I can find one more use for this? I hate to throw this away." Then, it came to me. A body scrub! This idea is for all you caramel lovers and novice bakers out there. Now, you don't have to waste a batch of "almost caramel" again! I must admit, as I walked my old mason jar full of wanna-be-caramel to the bathroom, I felt like I was walking a young child to a school for the first time. We were both a little unsure of what was about to take place. However, my skin felt and smelled delicious after my long soak in the tub! I realized that caramel cooked imperfectly makes the best body scrub! Consequently, I've learned yet another life lesson from the kitchen...do make mistakes. Even more importantly, I've learned to not be afraid of making them. A "mistake" is really a second chance in disguise. Happy baking...and scrubbing!
Lesson Learned: De-program yourself from thinking in linear ways. Challenge yourself to construct something new out of something very common. You'd be surprised at what you can discover. Remember, when thought of in the right way, mistakes can actually be put to good use
I do suggest that you refrigerate the caramel to prolong the shelf life. Use your favorite caramel recipe for the scrub. Just before reaching the required temperature, remove pan from heat and let it cool. Then, bottle and enjoy as needed.
Saturday, February 19, 2011
Sunday, February 13, 2011
For the Birds!
For the Birds!
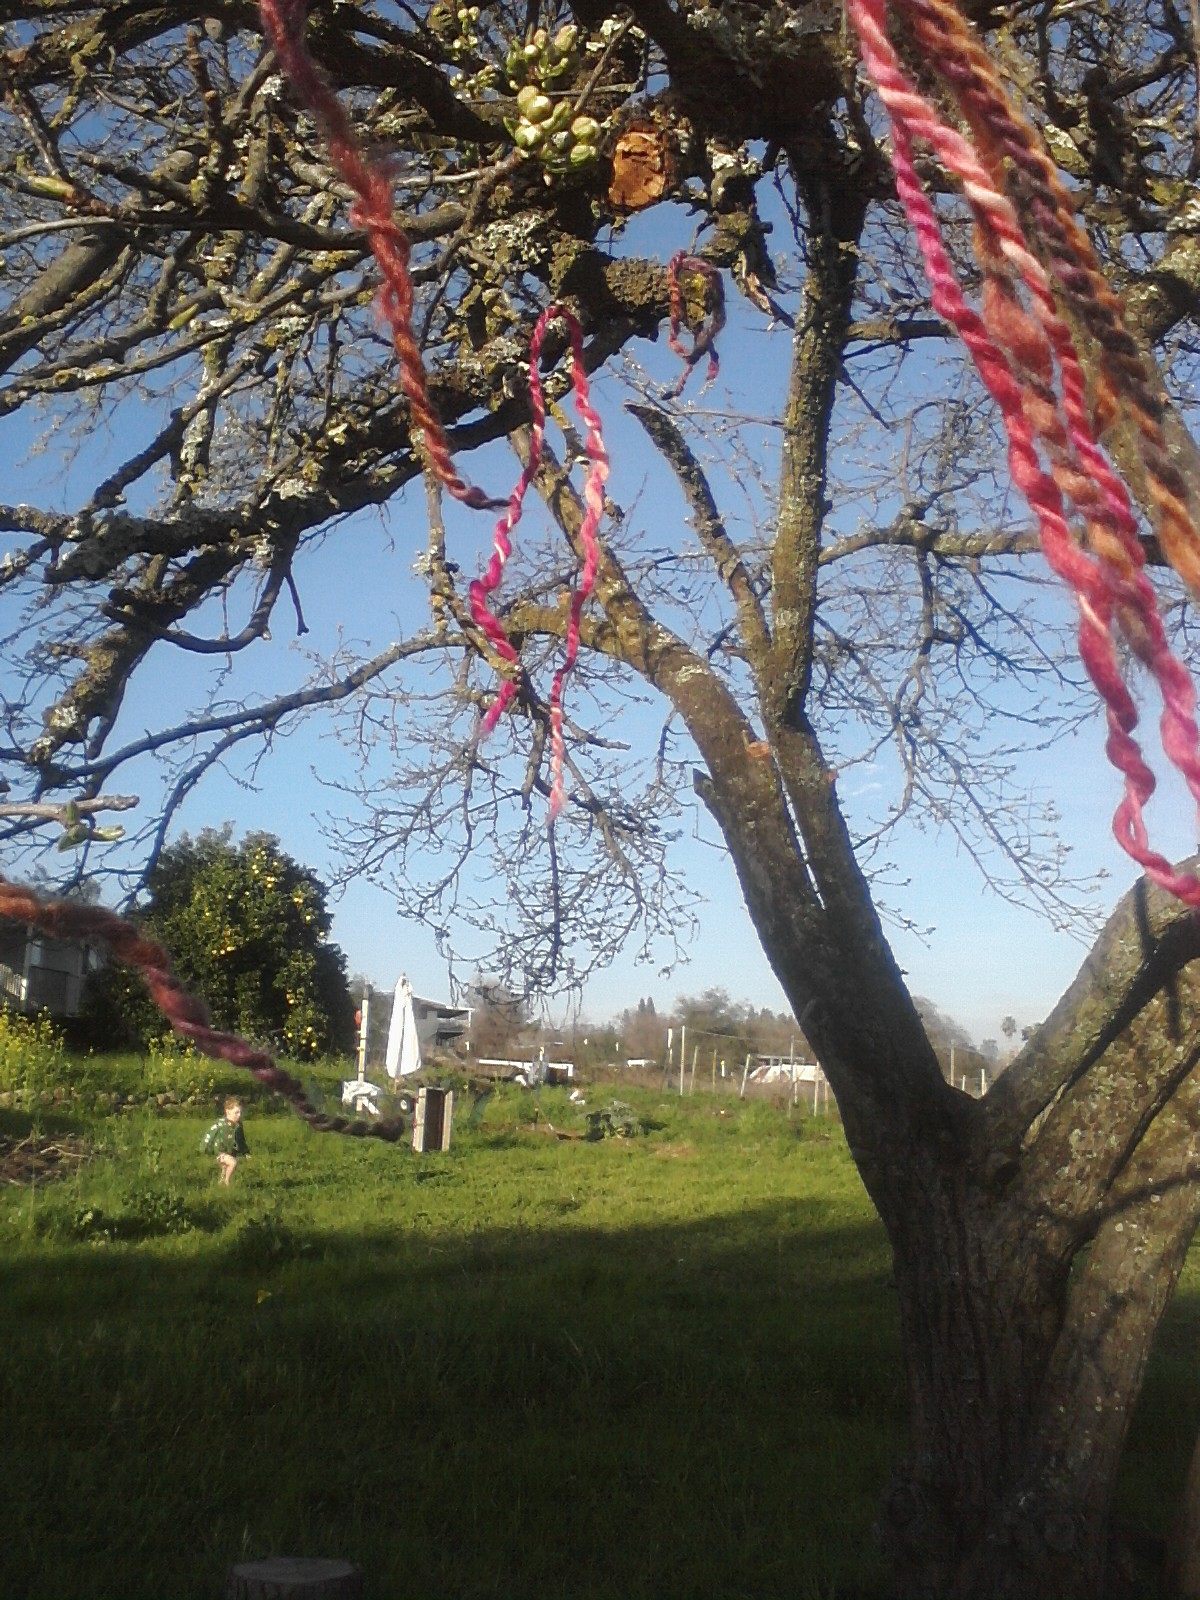
On any given day, inside or out, I can hear a bird singing its beautiful melody. Since I've been working on knitting, I happened to open two balls of yarn (purchased at a discount store) that were of no use. Cut to tiny pieces, I was literally left holding the yarn.
What to do? Can't knit with this stuff...ding! It occurred to me that I could hang the pieces of yarn from our beloved plum tree for the birds! Come spring, I can't wait to take the kids out to find birds nests made with our yarn! In the meantime, our tree looks very dazzling. Remember, birds knit too!
At first, I couldn't believe it! I was getting ready to knit, when I discovered small fragments of yarn coming loose. I decided to find an alteternate use for the beautiful wool.
Simply take segments of yarn, about 12 inches long and toss over branches. If desired, get kids involved. If they can't reach, give them a lift. The tree looks very stunning decorated in this manner.
Tried to get a few angles. My little camera phone can't capture the big picture, but can give you an idea.
~Happy Decorating~
Friday, January 28, 2011
All Natural Sidewalk Paint for Kids!
I'm always looking for things to do with the children that are easy, cheap, non-toxic, and environmentally safe. Recently, I came across this simple sidewalk paint recipe that the kids loved. When using the sidewalk paint, the kids can use their fingers, toes, paintbrushes or whatever they like. I think the recipe cost about fifty cents for the project.
Sidewalk Paint Recipe
1/4 cup cornstarch
1/4 cup cold water
6-8 drops food coloring (can mix natural colors too)
Mix together and create a work of art.
Sidewalk Paint Recipe
1/4 cup cornstarch
1/4 cup cold water
6-8 drops food coloring (can mix natural colors too)
Mix together and create a work of art.
Here are the bowls of paint mixes. The kids mixed the colors themselves. This was also a great way to learn about creating different color combinations.
Gabriel is holding up the corn starch that we used.
In action, Gabriel and Sarah are practicing becoming little Picassos.
This is what the sidewalk paint looks like.
It was a cold day outside. What better way to warm up than with a nice, warm cup of homemade hot chocolate? Mmmmm.
~Enjoy~
Wednesday, January 26, 2011
Become a Sprout Farmer In a Kitchen Window?
I'm a bargain shopper. Always have been, always will be. At first I started hunting down bargains for purely economical reasons. Then, once I kept on snagging those bargains faster than I could reel them in, I became hooked. Did you know that studies have shown that finding a good bargain releases very similar chemicals to those that are released when falling in love? Yes, it's true. These days, my reasons for bargain shopping have evolved into a combo of, I would say an eco-econ reasoning( meaning ecologically and economically). I take pride in knowing that we are doing our part to purchase second hand, or recycled items whenever possible. Not only does it save you money, but you are helping to create a world that will likely be much more pleasant than its alternative.
Below, I demonstrate how to easily grow sprouts. You can use broccoli, radish, clover, etc. I used radish and mong. Keep in mind that my kitchen window does not get direct sunlight. As long as some light filters through, that is all you need.
Cut a circle out of screen door mesh the size of your jar lid.
Before I trimmed the edges.
Here are some examples of what the mason jar looks like once the mesh is fitted.
Fill the mason jar with 1/4 cup of seed and let soak in water (half full) for 8 hours. Empty water. Fill jar with water again and swirl around. Pour out all water and let jar sit at a 45 degree angle for another day. Do this for three days. On the fourth day, fill and rinse seeds. Let sit in a very sunny window, or outside. That's it! Now you can reap what you have sewn.
Simple and easy sprouts! You too can be a kitchen window sprout farmer *winks*
Tuesday, January 18, 2011
Dirty Work
Today, I am purchasing a book called Animal, Vegetable, Miracle by Barabara Kingsolver. Not only do I have a voice as a consumer, but I have a voice as a mother. I hold the ability to teach my children (voting members of tomorrow) that our earth is a special place, just like their bodies. Gathering food grown from the earth (by their own two little hands) will NEVER be seen as backward or barbaric. Not if I can help it! What a sacred gift we have as mothers. We have the ability to shape a new generation. A generation that one day, will move on and into the land of tomorrow. A land that we will never see.
Here is an exerpt from the book that I saw on Amazon. It has me excited! May it inspire you to make a difference in your life, and in those around you.
"
where many different languages assign
similar scorn with the phrase “dirty work.”
My generation has absorbed an implicit
hierarchy of values in which working the
soil is poor people’s toil. Apparently we’re
now meant to rise above even touching the
stuff those people grow. The real labors of
keeping a family fed (as opposed to the
widely used metaphor) are presumed tedious
and irrelevant. A woman confided to me at a
time to cook anymore? My daughter will
probably grow up wondering what a kitchen
is used for.” The lament had the predictable
blend of weariness and braggadocio,
unremarkable except for this woman’s
post at the helm of one of the nation’s
major homemaking magazines.
This is modern thinking. Even keeping
house does not dirty its hands with food
production. Sorry, but we have work to do,
the stuff that happens in an office or agency
or retail outlet—waiting tables, for instance.
Clicking a cash register at the speed of light.
Driving a truck on a long-distance haul. We
have risen above the muddy business of an
agrarian society, heaven be praised. People
in
So, what are we going to do about this?
Friday, December 24, 2010
Croquembouche for Christmas Eve
So I attempted it. Looking back through Martha's books dating back several decades earlier, I couldn't help but notice it. Actually, it kept eyeing me. I wasn't all that interested at first, really. Shy but confident, I tried to explain to the over-glorified Egyptian pyramid, that I was a novice baker. Like a two year old folding their arms in defiance, no didn't matter.
In December of 2009, a Croquembouche was on the cover of Martha's monthly magazine. Towering at two feet high, the glossy, light-amber edible "Christmas tree" looked very tempting. Although my baking skills in the kitchen are a touch more advanced than basic, I decided to give it a try. My dad found out that I was attempting this and so he called me. He said, "That looks awfully advanced, Morgan. What are you going to do if it doesn't turn out?" I quickly told him that it's not life and death in the kitchen...well most of the time, that is. So if it didn't turn out, I'd laugh about it and melt into a quiet evening NOT in the kitchen.
For some unexplainable reason (the stars must have been aligned kinda thing), it turned out. Some of you have asked me to post pictures of my finished product, and so I have. I have also included some VERY important comments that you will NOT find elsewhere. Happy baking!
1) Rule number one. Bake WITHOUT A BRA ON while wearing a slightly ethereal t-shirt. I did, and I got free babysitting from, oh about 3:30 until 9:30pm! It was wonderful. Thank you Ben! Don't do this if you have company over or if you have children old enough to gawk and run away from you in horror.
2) Isn't it amazing what such simple ingredients can yield? I had to capture the simplicity here.
3) While making the puffs, once you have melted the butter in the water with the salt and sugar, add the flour slowly. If you don't, it will be one big lumpy mess here. By the way, the mixing required at this step is a workout. There is absolutely no need to lift any weights today, ladies! Wooohoooo!
4) While following the directions for your Croquembouche(regardless of where you find your recipe), you want to mix the water, butter, salt and sugar well until you notice a film on the bottom of your pot. Here is a picture of what the film looks like.
5)When it comes to piping the puffs onto the parchment paper, I could not find my 1/2-inch-wide pastry tip. Soooo, I just used the coupler without a tip and called it good. Just remember, if you do this, after piping onto parchment, go back with your fingers and smooth out the puffs to keep them looking round.
6) Do not forget the egg glaze. I had Ben give me a hand with a round of puffs in the oven and he forgot. Bless his heart. The glaze is important because it keeps them shiny and helps them to brown nicely too.
7) The pastry cream has two steps. The first stage without the addition of chocolate, and then the second stage where you add your melted chocolate. Beginning with the first stage, you are making a custard-like cream here. Watch your temperature! Really, really scrape the bottom of your pot while mixing continuously so that nothing burns. Trust me, it's a long story.
8) Once you melt your chocolate and espresso in a double boiler (or a heat proof bowl), add that mix to your pastry cream. Make sure you work out all the lumps. Use the back of your spoon to help you, if needed. Remember, the cream is going to be bitten into, so you want a nice uniform texture. No lumps.
9) Backing up to the "custard step", you will notice that scalding your milk is required. I thought, "What the heck is that?" Scalding your milk means that you want to warm it to 185 degrees. Scalding helps by destroying enzymes that affect how the milk behaves in your recipe and it keeps the milk from thickening too much in your batter. So don't get confused when they tell you to scald the milk. Just get out your trusty old candy thermometer and wait for the temp to reach 185.
10) When filling your pastry puffs with cream, your recipe will typically call for a 1/4-inch-wide tip. Again, couldn't find it, so I just used a medium tip that was pointy enough to puncture the puff. Don't worry if you don't have the 1/4-inch-wide tip.
11) For the spun sugar- I did not use the spun sugar. Keep in mind that spinning sugar can be tricky. When making the caramel, the extra caramel is going to be spun (by moving two forks back and forth with the caramel in between) and should be a VERY light amber color. Once the sugar becomes darker than this, something really odd happens. Once it cools, hard sugar crystals form and you can kiss your spun sugar croquembouche goodbye. I made two batches of spun sugar and found that if I had just worked quickly assembling the Croquembouche, the original batch of caramel would have been fine for spinning. Key point- work quickly and don't over heat your caramel.
12) Safety Point: At one point you will be dipping your pastry puff into HOTTTT caramel. USE small tonges to do this. I didn't and I scalded not only the milk today, but my right middle finger, in addition to a few tips of my fingers. Profanity flung out of my mouth. Trust me, even if you don't swear, strange and awful words will come out. Be careful!
13) Enjoy!
In December of 2009, a Croquembouche was on the cover of Martha's monthly magazine. Towering at two feet high, the glossy, light-amber edible "Christmas tree" looked very tempting. Although my baking skills in the kitchen are a touch more advanced than basic, I decided to give it a try. My dad found out that I was attempting this and so he called me. He said, "That looks awfully advanced, Morgan. What are you going to do if it doesn't turn out?" I quickly told him that it's not life and death in the kitchen...well most of the time, that is. So if it didn't turn out, I'd laugh about it and melt into a quiet evening NOT in the kitchen.
For some unexplainable reason (the stars must have been aligned kinda thing), it turned out. Some of you have asked me to post pictures of my finished product, and so I have. I have also included some VERY important comments that you will NOT find elsewhere. Happy baking!
1) Rule number one. Bake WITHOUT A BRA ON while wearing a slightly ethereal t-shirt. I did, and I got free babysitting from, oh about 3:30 until 9:30pm! It was wonderful. Thank you Ben! Don't do this if you have company over or if you have children old enough to gawk and run away from you in horror.
2) Isn't it amazing what such simple ingredients can yield? I had to capture the simplicity here.
3) While making the puffs, once you have melted the butter in the water with the salt and sugar, add the flour slowly. If you don't, it will be one big lumpy mess here. By the way, the mixing required at this step is a workout. There is absolutely no need to lift any weights today, ladies! Wooohoooo!
4) While following the directions for your Croquembouche(regardless of where you find your recipe), you want to mix the water, butter, salt and sugar well until you notice a film on the bottom of your pot. Here is a picture of what the film looks like.
5)When it comes to piping the puffs onto the parchment paper, I could not find my 1/2-inch-wide pastry tip. Soooo, I just used the coupler without a tip and called it good. Just remember, if you do this, after piping onto parchment, go back with your fingers and smooth out the puffs to keep them looking round.
6) Do not forget the egg glaze. I had Ben give me a hand with a round of puffs in the oven and he forgot. Bless his heart. The glaze is important because it keeps them shiny and helps them to brown nicely too.
7) The pastry cream has two steps. The first stage without the addition of chocolate, and then the second stage where you add your melted chocolate. Beginning with the first stage, you are making a custard-like cream here. Watch your temperature! Really, really scrape the bottom of your pot while mixing continuously so that nothing burns. Trust me, it's a long story.
8) Once you melt your chocolate and espresso in a double boiler (or a heat proof bowl), add that mix to your pastry cream. Make sure you work out all the lumps. Use the back of your spoon to help you, if needed. Remember, the cream is going to be bitten into, so you want a nice uniform texture. No lumps.
9) Backing up to the "custard step", you will notice that scalding your milk is required. I thought, "What the heck is that?" Scalding your milk means that you want to warm it to 185 degrees. Scalding helps by destroying enzymes that affect how the milk behaves in your recipe and it keeps the milk from thickening too much in your batter. So don't get confused when they tell you to scald the milk. Just get out your trusty old candy thermometer and wait for the temp to reach 185.
10) When filling your pastry puffs with cream, your recipe will typically call for a 1/4-inch-wide tip. Again, couldn't find it, so I just used a medium tip that was pointy enough to puncture the puff. Don't worry if you don't have the 1/4-inch-wide tip.
11) For the spun sugar- I did not use the spun sugar. Keep in mind that spinning sugar can be tricky. When making the caramel, the extra caramel is going to be spun (by moving two forks back and forth with the caramel in between) and should be a VERY light amber color. Once the sugar becomes darker than this, something really odd happens. Once it cools, hard sugar crystals form and you can kiss your spun sugar croquembouche goodbye. I made two batches of spun sugar and found that if I had just worked quickly assembling the Croquembouche, the original batch of caramel would have been fine for spinning. Key point- work quickly and don't over heat your caramel.
12) Safety Point: At one point you will be dipping your pastry puff into HOTTTT caramel. USE small tonges to do this. I didn't and I scalded not only the milk today, but my right middle finger, in addition to a few tips of my fingers. Profanity flung out of my mouth. Trust me, even if you don't swear, strange and awful words will come out. Be careful!
13) Enjoy!
The below picture shows the puffs before assembly.
The kids absolutely loved it!
Here it is!
The assembly
I'm getting a little tired here. Can ya tell?
The chocolate-espresso filling is kicking in.
Girls LOVE chocolate.
The End...
Thursday, December 16, 2010
The Christmas Hunt...
Most of us have, at one time or another, longed for that one special gift that we wanted to open on Christmas morning (or even earlier if it was up to us!). Back in the day, when I was in seventh grade, it was cherry red Doc Martin's. The red ones, that came up just past your ankles. With black and white striped stockings on, I thought I could join just pack up and join the Cranberries, because I just "fit right in". Oh my, that's taking me back!
This year, my two younger children, Sarah and Gabriel don't yet have that material longing that I had developed as I had reached my early teens. Both children are absolutely fascinated with puppets, so for them, wrapped in a huge box (for them to play in later), we are making them sock puppets.
Recently, Jordan (my 12 year old) has become quite the knitter in the family. Soon, he is going to complete his very first scarf! Honestly, he is much better at it than me. The stitches come easily to him and they just stitch together beautifully. In the most recent issue of a farm magazine, there was an article about Angora Rabbits. Jordan fell in love with the "puffy clouds" as he calls them and wants one for Christmas. Did you know that you can use their fiber to make all kinds of useful and interesting knitted items? I always love Christmas presents that are affordable, useful, eco friendly and can be put to use! So, no matter where you live, either in the expansive countryside, or in a tiny loft, rabbits are so easy to care for and keep. They are clean animals and so fun to keep. I've even heard of people knitting their rabbits outfits!
No matter how you have decided to present those presents to your loved ones, do it with flair and with the environment in mind. You can't go wrong when compassion is the driver of your decisions. Wishing you all a happy, peaceful and merry Christmas and holiday season too!
Subscribe to:
Posts (Atom)